Druid SIP
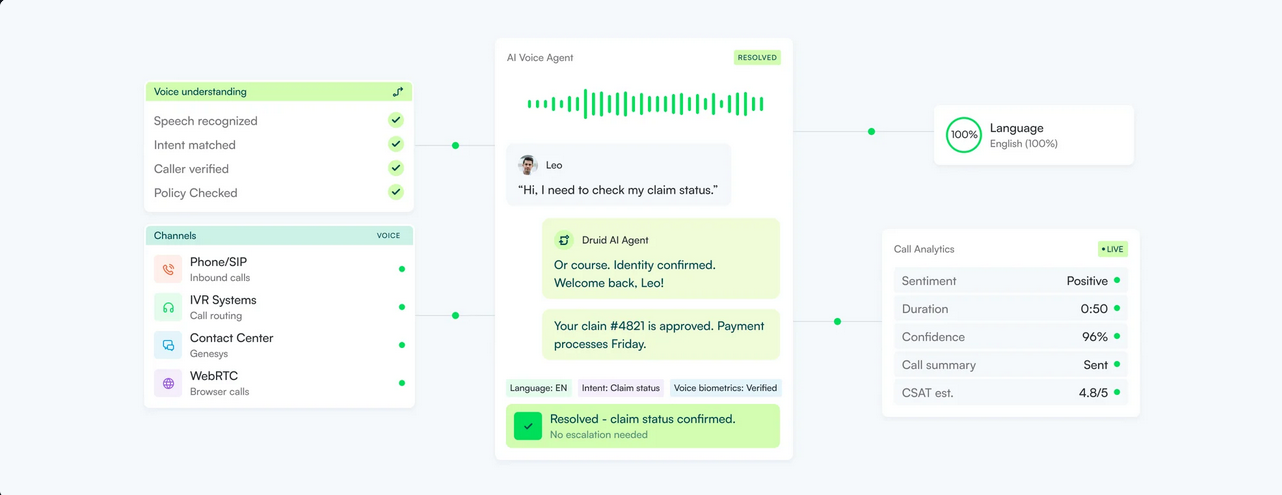
Druid Voice ensures high interoperability between AI Agents and VOIP systems or SIP trunk services. By leveraging Druid SIP, you can connect AI Agents directly to telephony infrastructure to manage voice traffic and DTMF (touch-tone) inputs with granular control.
Configure Druid SIP Connectivity
To establish the connection between your AI Agent and your telephony system:
Step 1. Set up the general settings in Druid
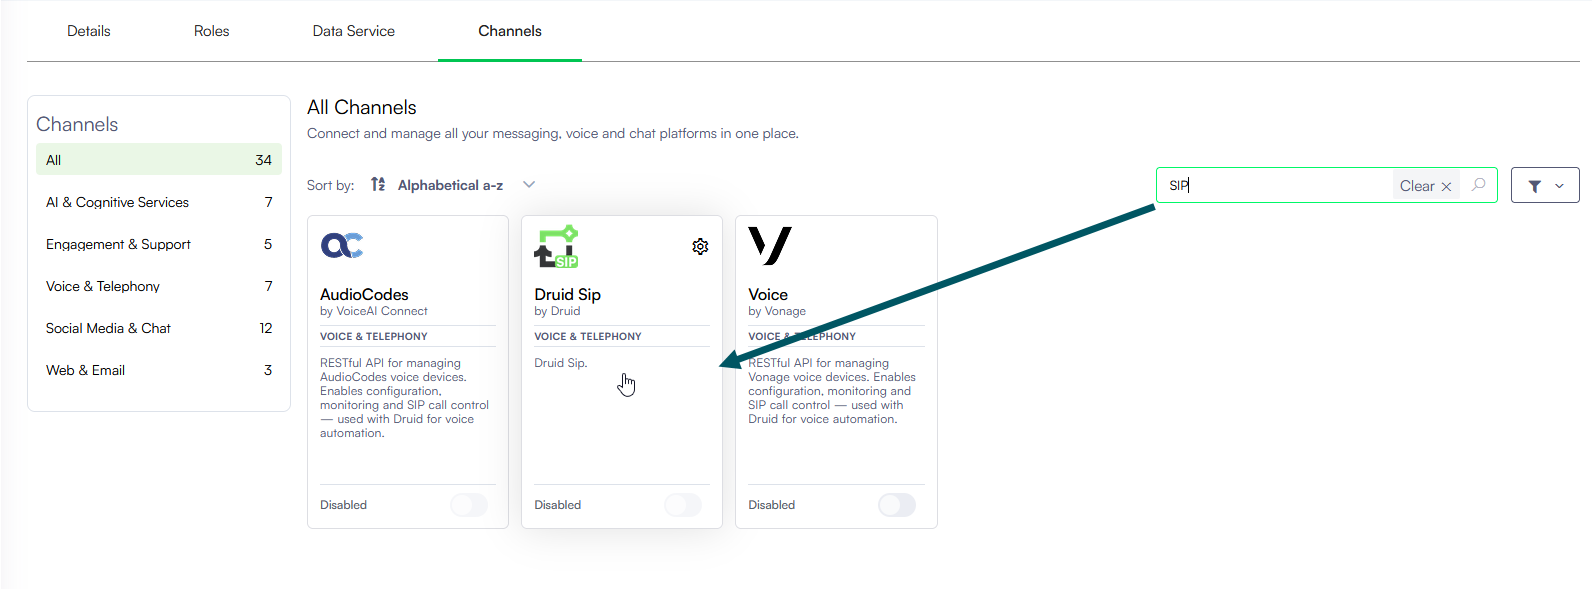
- In the Druid Portal, navigate to your AI Agent and select the Channels tab.
- Search for 'sip' and click on the Druid SIP card.
- In the configuration modal, General tab, configure the following parameters:
- Full IP address: e.g., 192.168.1.1
- Subnet (CIDR notation): e.g., 10.0.0.0/24
- Wildcard pattern: e.g., 172.16.*.*
| Setting | Description | Mandatory | Default value | ||||||||||||||||
|---|---|---|---|---|---|---|---|---|---|---|---|---|---|---|---|---|---|---|---|
| SIP FQDN |
The SIP FQDN of the voice AI Agent. Currently supported protocols: TCP & UDP, on port 5060. TLS will be available soon. Info: Copy the SIP FQDN as you will need it to connect the telephony system to Druid.
|
||||||||||||||||||
| AI Agent URL | It's available for debugging purposes only during the technology preview. | - | |||||||||||||||||
|
Druid SIP Token |
Click Generate to create the token Druid uses for secure SIP connectivity. |
Yes |
|
||||||||||||||||
|
Phone numbers |
The DID phone numbers assigned to the AI Agent. Enter each number on a new line. IMPORTANT! This is the identifier of the voice AI Agent and must be written in the exact same format as it's being sent through the SIP Invite event, by the contact center solution (for example, any E.164 format: +1 321 111 222 3333).
|
Yes |
|
||||||||||||||||
| Allowed IPs |
Define the permitted source IP addresses for AI Agent access. This adds a security layer by restricting communication to specific origins. Multiple entries can be added, with each rule placed on a separate line. The field supports three formats: NOTE: This parameter is available starting with Druid 9.22.
|
No | |||||||||||||||||
|
Enable VAD |
Enables Voice Activity Detection to identify when a user starts or stops speaking. |
Yes |
true |
||||||||||||||||
|
Speech threshold |
The sensitivity level (0 to 1.0) for detecting speech. Higher values require louder input. |
Yes |
0.5s |
||||||||||||||||
|
Enable barge-in |
Allows the user to interrupt the AI Agent while it is speaking. |
No |
true |
||||||||||||||||
|
Barge-in consecutive frames |
The number of consecutive audio frames required to trigger a barge-in interruption. Adjusting this value allows you to balance the AI Agent responsiveness against the risk of false triggers from background noise. Default Value: 3 frames (during tech preview). A lower frame count makes the AI Agent more sensitive to interruptions, while a higher frame count requires a longer, sustained sound to trigger a response. Use the table below to estimate the impact of your frame count on the user experience:
|
No |
3 |
||||||||||||||||
|
Enable audio recording |
Not supported in this version. |
|
|
||||||||||||||||
|
DTMF buffer timeout (ms) |
The time to wait for the next touch-tone digit before processing the input. |
Yes |
3000ms |
||||||||||||||||
|
DTMF buffer terminator |
The DTMF character used to indicate the end of user input. Leave the field empty to use only the DTMF timeout or the buffer length. |
No |
# |
||||||||||||||||
|
DTMF max buffer length |
The maximum number of digits allowed before the input is automatically sent. |
Yes |
1 |
||||||||||||||||
|
DTMF duplicate filter (ms) |
The duration in milliseconds used to ignore accidental duplicate touch-tone inputs. |
Yes |
20s |
Configure the desired speech providers following the instructions in the subsequent sections.
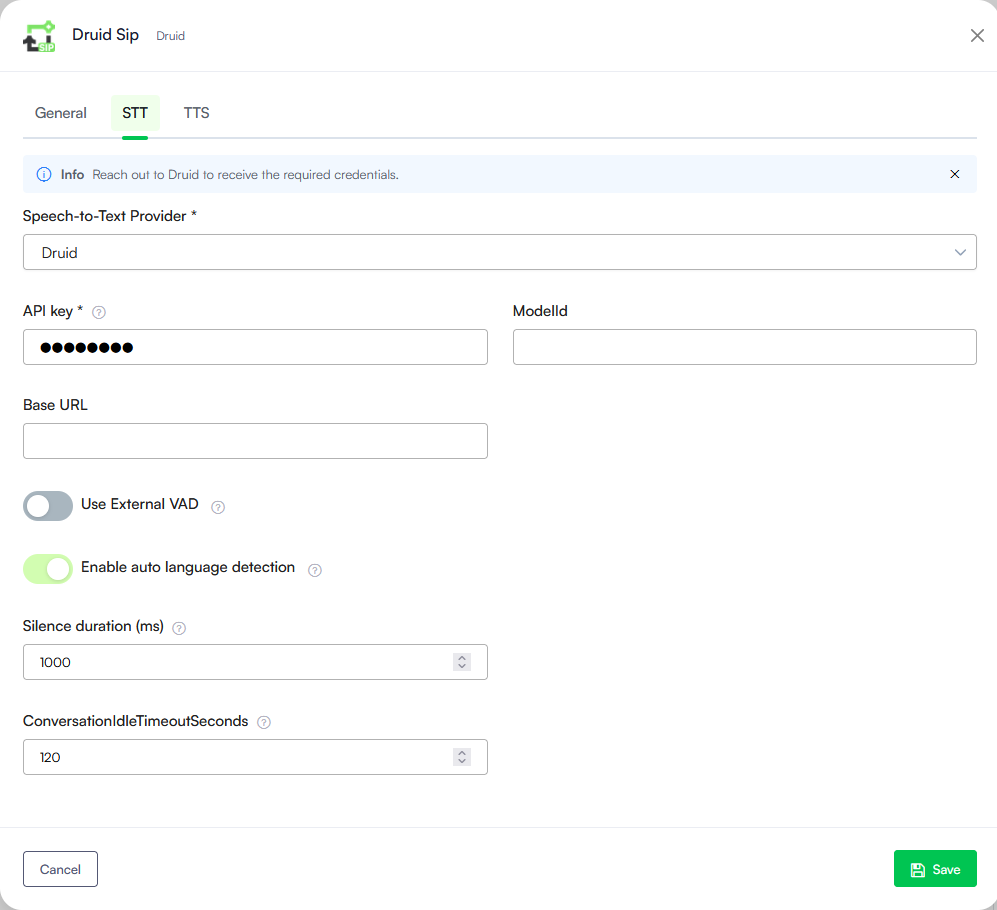
Step 2. Set up the STT service
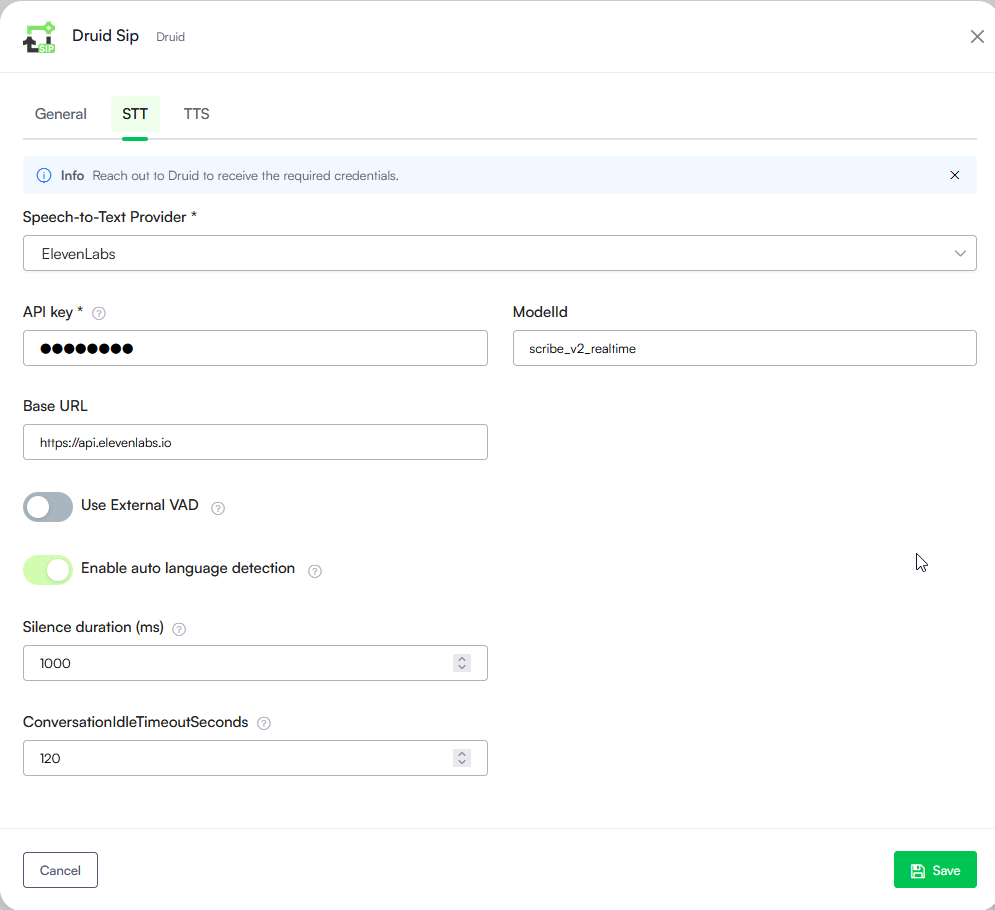
- In the configuration modal, click the STT tab.
- From the Speech service type dropdown, select the STT service provider. Additional settings appear specific to the selected provider.
- Fill in the details specific to the selected provider:
- Druid. Enter the connection details you received from Druid.
- Azure. Enter your Subscription key and the Region identifier. Take your region identifier from the Microsoft documentation.
- ElevenLabs. Enter your ElevenLabs API key.
- If using Druid or ElevenLabs, select Use External VADto use the STT provider's Voice Activity Detection (VAD) to identify when speech begins and ends.
- Configure the detection timeouts:
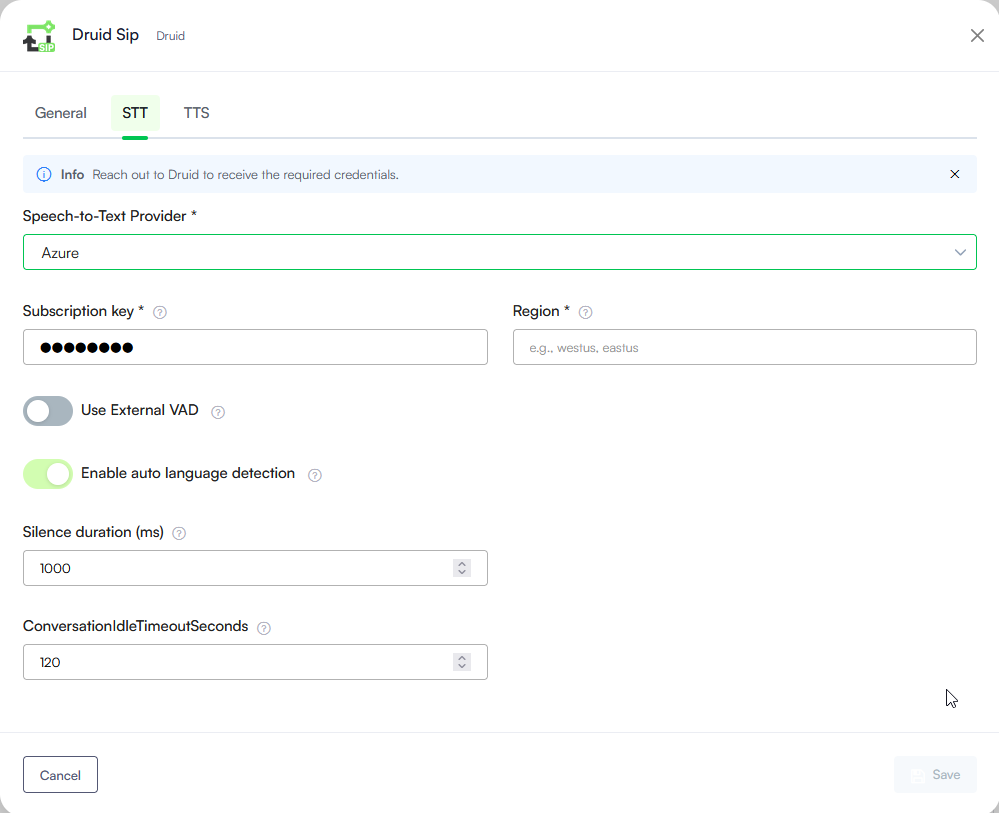
| Timeout | Description |
|---|---|
| Silence duration (ms) | The amount of silence required after a user stops speaking before the system considers the utterance finished and begins processing. Increase this value if users are frequently cut off mid-sentence; decrease it to make the AI Agent more responsive. |
| ConversationIdleTimeoutSeconds | The duration of total inactivity allowed before the call is automatically disconnected. Default value: 120s. |
Step 3. Set up the TTS service
You can use different TTS service providers for different AI Agent languages.
To add a TTS provider for a specific language:
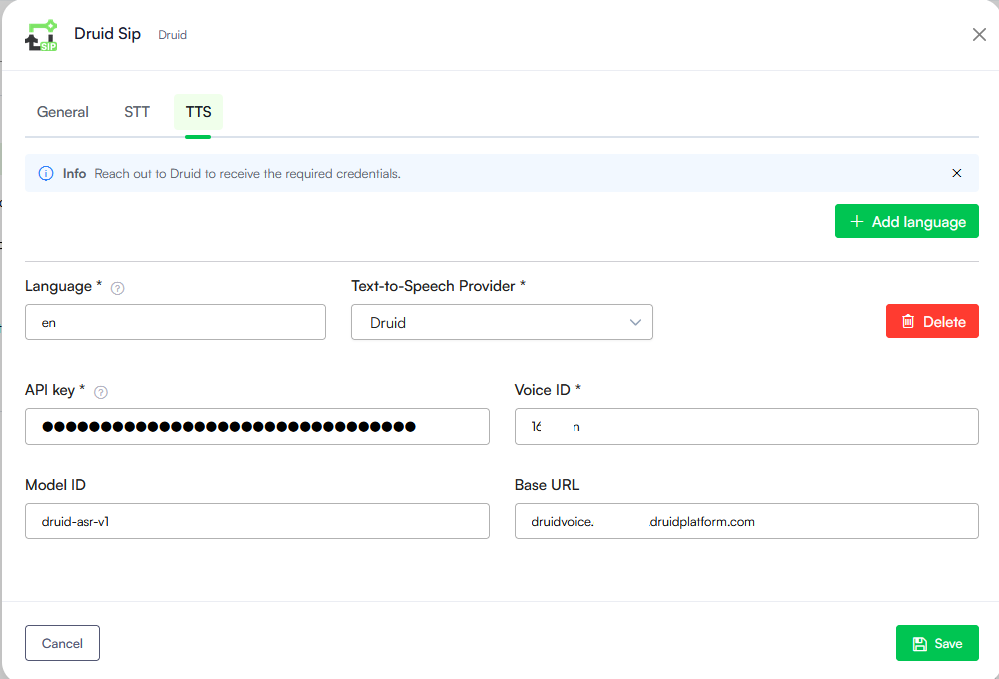
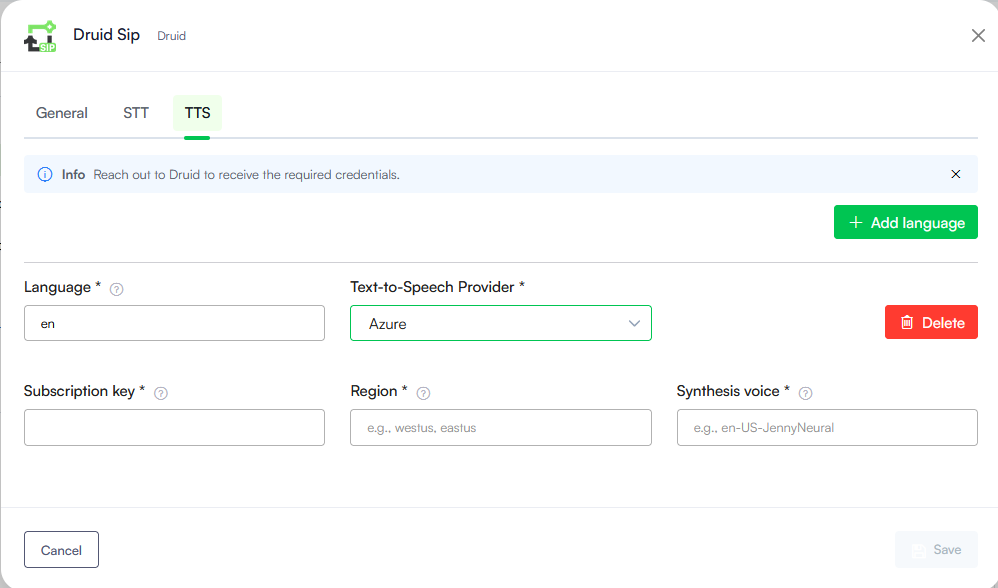
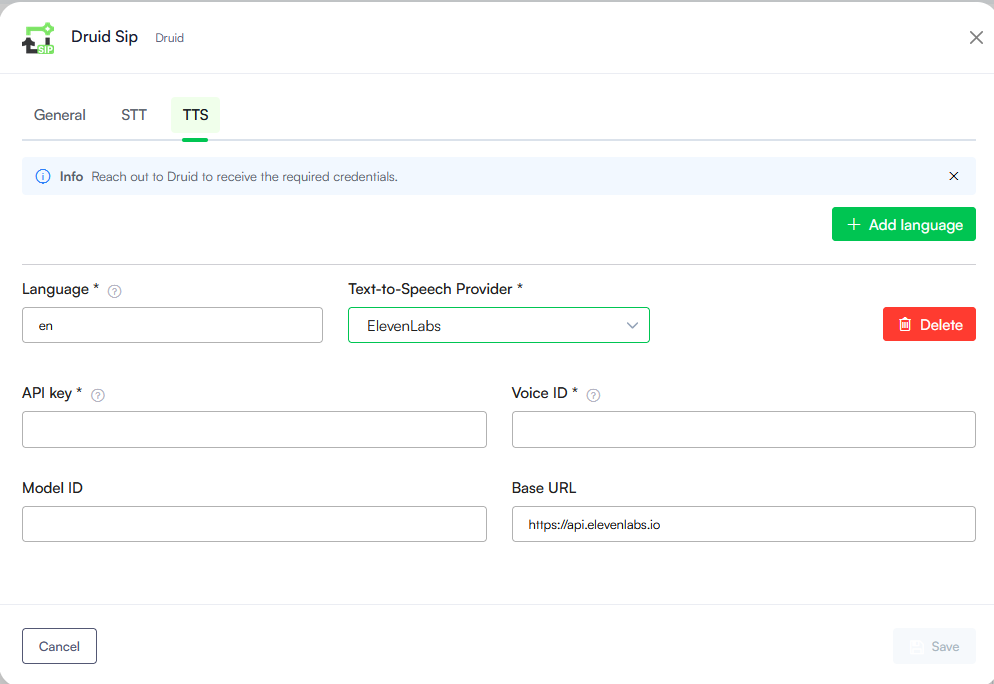
- In the configuration modal, click the TTS tab.
- Click the Add language button.
- In the Language field, enter the language code used in Druid of the AI Agent language (default or additional). For example, ro for Romanian. For more information, see Druid Supported Languages.
- From the Speech service type dropdown, select the desired TTS service provider. Additional settings appear specific to the selected provider.
- Fill in the details specific to the selected provider:
- Druid. Enter the details you received from your Druid representative. In the Language field, enter the Druid language code, as listed here.
- Azure. Enter your Subscription key and the Region identifier. Take your region identifier from the Microsoft documentation.
- ElevenLabs. Enter your ElevenLabs API key, the Voice ID and Model ID to be used.
- Save the configuration.
In the Synthesis voice field, enter the specific voice the AI Agent will use to respond. Take the voice identifier from the Microsoft documentation.
Context Parameters
After the Druid SIP configuration activates, the system automatically provisions specific [[ChatUser]] parameters within the conversation context. The following parameter is initialized by default:
[[ChatUser]].ChannelId = "druid-sip"
Step 4. Connect your telephony system to Druid
Configure your telephony provider to use the SIP FQDN as the primary routing domain. You can find this value in the Druid SIP Configuration modal.
Testing with MicroSIP
For testing purposes, follow these steps to configure MicroSIP:
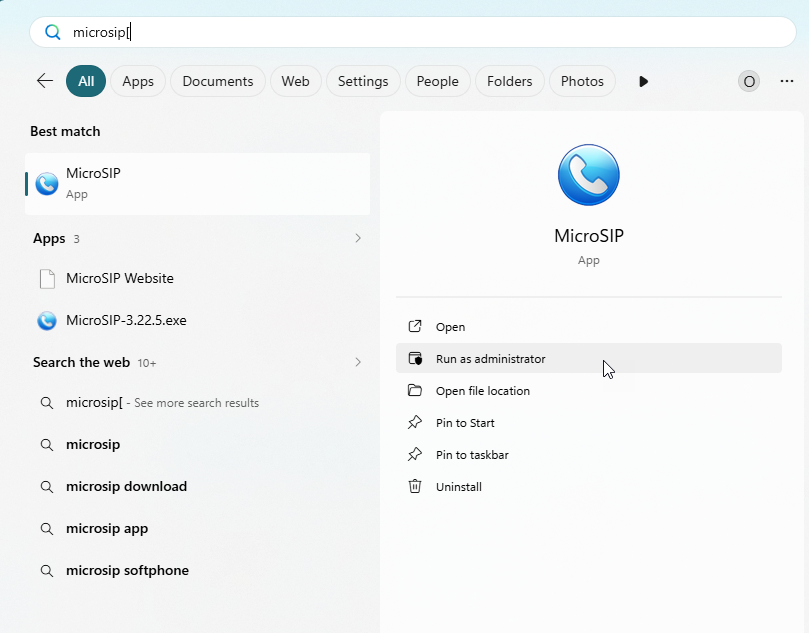
- Download and install MicroSIP from the official website.
- Run the application as Administrator.
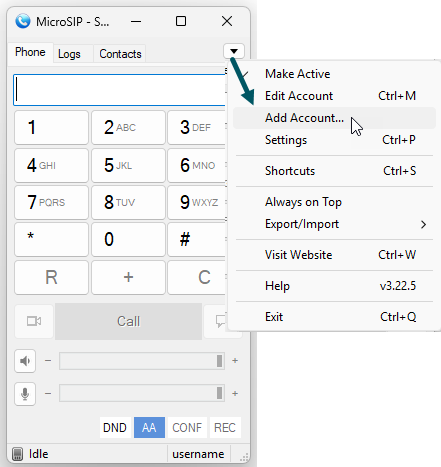
- Set up an account:
- Click the Actions icon (the downward arrow) and select Add Account.
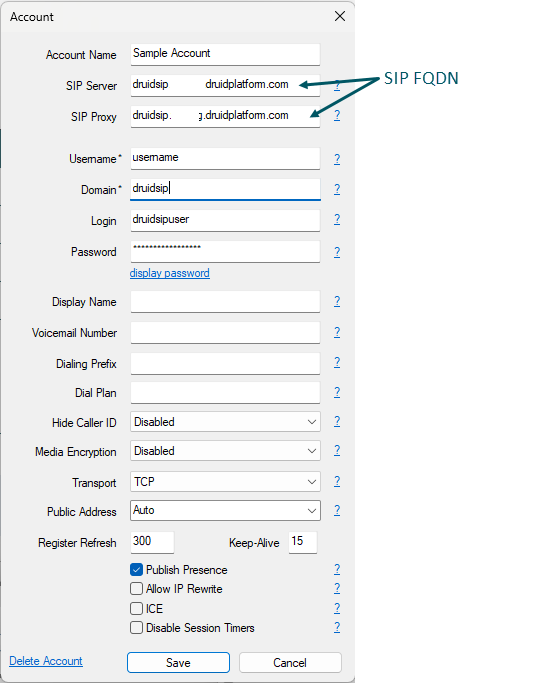
- Complete the following fields in the Account modal:
- Click Save to activate the account.
| Field | Description |
|---|---|
| Account Name | Enter a name for your reference. |
| SIP Server | Enter the SIP FQDN copied from the Druid Portal. |
| SIP Proxy | |
| Username | Enter your designated SIP username. |
| Domain |
Enter the details you received from Druid. |
| Login | |
| Password | |
| Media Encryption |
Set to Disabled. NOTE: Encryption is currently unsupported.
|
| Transport |
Select TCP or UDP. Druid communicates with telephony systems on port 5060 via the TCP and UDP protocols. NOTE: TLS will be available in a future release.
|